Voice systems are something I have a decent little bit of experience with over the course of my career so far.
My first job was for a debt collection call center. While I won't get into all the details of how that environment worked, for obvious reasons, the job did give me experience with Cisco VoIP systems (CUCM, UCCX, CUC, UCCE), ISDN/PRI, SIP, fax machines, and a host of phone makes and models. I never obtained a certification in any collaboration products though, I just never found it necessary.
With most all technologies I came across in my early career, I took the same approach to learning these. I created VMs in my homelab with all of these products and set them up from scratch. I learned how their buttons worked, what they did, I found the pitfalls of bad setups, and the elegance of good ones. Having a place to play, while at the same time having a working reference to look at, combined to help jump start my learning.
While my homelab is gone, for the most part, I still kept a Cisco 9971 IP Phone under my bed. The other day, I had the motivation to have it back on my desk and working. I don't have the resources I did before, so this PBX has to be a bit lighter.
Solutioning
For over a year, I had a tab open on my phone for UseCallManager.nz which is a patch for the VoIP platform Asterisk. The patch has the goal of supporting more Cisco specific VoIP features, which they detail on the project homepage.
This was enticing, coming from a Cisco background, I felt it would bring some familiar features and be an interesting perspective on an ecosystem I know pretty well. I knew I wanted to try it, but before I could, I had some problems to solve.
- I no longer have a rack of servers, I'll need to find compute
- I don't fully control the networking in my environment, NAT may be non-trivial
- I have a flat network, I'll need VLANs
- My desk is a mess and I can't fit the phone
So I started putting together a plan.
Prototyping
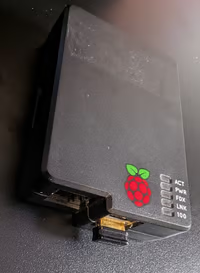
My Raspberry Pi - originally ran RaspBMC for my TV back in the day
Before I could answer all of these questions, I had the first question in front of me before I could start planning: what will this run on?
When I decommissioned my homelab, I got rid of all the equipment. I no longer have any enterprise servers kicking about. What I have on hand was limited:
- A Raspberry Pi 1B
- An Intel NUC
The Raspberry Pi is old these days. 32-bit ARM, with 512MiB of memory, it wasn't exactly a powerhouse. However, it was sitting in a box and is a low power device with a WiFi module and an ethernet port. Maybe it could work?
I'll spare you a long painful wait to say it didn't work. In short, while Asterisk, with the patch, should build on the Pi just fine, it was taking hours to do. After bumping the power cable one too many times, I decided to abandon the idea.
The NUC was a different story.
My Intel NUC is a good many years old itself, however it has much more power. An Intel i3, 64bit, and 8GiB of memory. Built in WiFi, an ethernet port. Downside, it was my current PC for my TV.
However, with the release of the Steam Machine, which I was lucky enough to get my hands on, I had a new home theater PC already on the way. I knew the NUC would be more than capable, so I decided to move forward with that as the plan.
Outline
I started with a basic outline of the project, and a diagram.
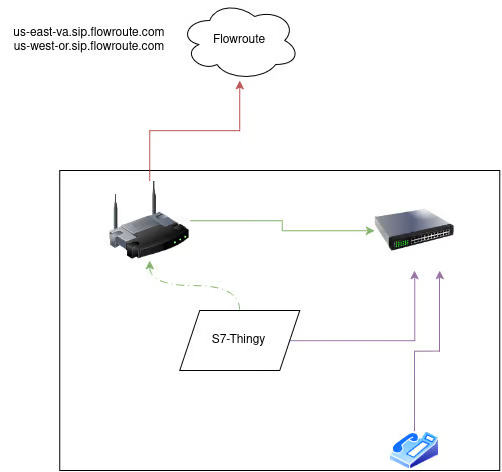
* Network config
  - Figure out how to log in to switch (what's the IP address of it? is it on 192.168.1.0/24? 172.30.10.0/23?)
  - Configure switchports for VOIP network (at least one port must be PoE)
* Configure VOIP server
  - Build/install Asterisk
  - DHCP server
  - HTTP server
  - Routing from voip network to internet(?)
* Configure Asterisk/phone
  - SIP registration to flowroute
  - Security files for phones? TLV?
  - Phone config reset (with sec clear)
  - Write base phone config
  - Phone firmware load
* Physical
  - How to wire nuc
  - Monitor arms
  - Cabling for phone on desk

Assumptions and unknowns
 - Asterisk has an MTP that will handle RTP stream to flowroute (and direct internet RTP)
 - I should be able to register and config using IPs everywhere, preventing need to have a DNS domain/config
 - Flowroute SIP registration shouldn't require inbound port forwarding
 - I vaguely think the netgear switch has some dead ports due to lightning surge. As long as two ports work it's fine
Now, you'll notice a section on assumption I made. Some of these ended up being wrong, but let's not get ahead of ourselves.
Executing
The plan set, I had a few places to start.
First, I'd placed an order for new monitor arms for my desk, I needed to be able to fit this nice executive IP phone on my desk, after all.
Next, I started on the NUC.
Installing and Building
I'm partial to the Red Hat ecosystem, so which linux distribution to use wasn't a hard choice. I grabbed a minimal ISO of Rocky Linux and got it installed on the NUC.
After basic config and network connectivity, I grabbed a copy of Asterisk 20.
I chose to use a 20.x version of Asterisk, because the UseCallManager patch listed version 22.x as "ready for testing" which, being my first time using this patch and Asterisk, I wanted to avoid the chance of hard-to-troubleshoot issues.
# Download and extract Asterisk
wget https://github.com/asterisk/asterisk/releases/download/20.20.1/asterisk-20.20.1.tar.gz
tar -xf asterisk-20.20.1.tar.gz

# Run prereq isntall script
sudo ./asterisk-20.20.1/contrib/scripts/install_prereq install

# Download UseCallManager patch and apply
wget https://raw.githubusercontent.com/usecallmanagernz/patches/master/asterisk/cisco-usecallmanager-20.20.0.patch
cd asterisk-20.20.1
patch --strip=1 < ../cisco-usecallmanager-20.20.0.patch

# There were a few missing dependencies, despite the script. Installed those
sudo dnf config-manager --set-enabled crb
sudo dnf -y install jansson-devel openssl-devel libedit-devel

# Finally build and install
./configure
make menuselect.makeopts
./menuselect/menuselect --enable ENABLE_SRTP_AES_256 menuselect.makeopts
./menuselect/menuselect --enable ENABLE_SRTP_AES_GCM menuselect.makeopts
make all
sudo make install
sudo make samples

# I nabbed the systemd unit files from contrib as a starting point
sudo cp contrib/systemd/* /etc/systemd/system/
With this, I had a built and installed version of Asterisk with some sample config. Before I could start really playing with Asterisk, though, I knew I'd need a SIP device to register and test with. I needed my phone working. For that, I needed a voice network, a DHCP server, and an HTTP server.
Voice Network and Phone Config
My history of working with Cisco Collaboration software meant I knew a decent amount about what I needed to have and configure. In basic terms, I needed
- A network with a DHCP server offering option 66 or "tftp-server-name"
- A TFTP or HTTP server for phone config
Another thing I could have added here is a Trust Verification Service (TVS) in order to secure everything better. UseCallManager even has a nice page on the subject as well as the tools to handle this. I decided to skip it, as the voice network I intended to set up would be isolated from the Internet and the deployment was very low risk. I may still revisit this for fun later.
Another decision I made was to use HTTP for the config, rather than TFTP. This was an easy call because TFTP is awful to work with.
First, let's set up our "voice network"
Voice Network
This was going to be very simple. With the NUC connected to WiFi, the ethernet port on the device was going to act as my voice network. This keeps the voice network isolated from the rest of the network, as well as makes configuration of the phone and DHCP handling far easier, as I don't control the DHCP server for my network these days.
The configuration of the interface was nothing special.
# Add the interface in nmcli
nmcli con add type ethernet con-name eno1 ifname eno1 ipv4.method manual ipv4.address 172.30.11.1/24 ipv6.method disabled

# I also wanted to use a separate firewalld zone for this, so I used 'internal'
firewall-cmd --zone=internal --change-interface=eno1
DHCP
On Rocky Linux, these days, the go-to DHCP daemon is ICS's Kea which, while I didn't have a huge amount of experience in configuring, was fairly simple.
# Installing kea
dnf -y install kea

# Enable the service
systemctl enable --now kea-dhcp4

# Add the service to the firewalld zone
firewall-cmd --zone=internal --add-service dhcp --permanent
firewall-cmd --reload
The configuration I used was straight forward as well:
{
"Dhcp4": {
    "interfaces-config": {
        "interfaces": [ "eno1" ]
    },

    "control-socket": {
        "socket-type": "unix",
        "socket-name": "kea4-ctrl-socket"
    },

    "lease-database": {
        "type": "memfile",
        "lfc-interval": 3600
    },

    "expired-leases-processing": {
        "reclaim-timer-wait-time": 10,
        "flush-reclaimed-timer-wait-time": 25,
        "hold-reclaimed-time": 3600,
        "max-reclaim-leases": 100,
        "max-reclaim-time": 250,
        "unwarned-reclaim-cycles": 5
    },

    "renew-timer": 900,
    "rebind-timer": 1800,
    "valid-lifetime": 3600,

    "subnet4": [
        {
            "id": 1,

            "subnet": "172.30.11.0/24",

            "pools": [ { "pool": "172.30.11.10 - 172.30.11.250" } ],

            "option-data": [
                {
                    "name": "tftp-server-name",
                    "data": "172.30.11.1"
                }
            ],

        }
    ],

    "loggers": [
    {
        "name": "kea-dhcp4",
        "output-options": [
            {
                "output": "kea-dhcp4.log"
            }
        ],
        "severity": "INFO",
        "debuglevel": 0
    }
  ]
}
}
Then, I simply restarted kea systemctl restart kea-dhcp4 and had a working DHCP server.
HTTP
To keep things as simple as possible, I decided to just use nginx as my HTTP server. As well, since I had already decided not to use a TVS, no TLS would be used here.
# Install nginx
dnf -y install nginx

# Enable service
systemctl enable --now nginx

# Add service to firewalld
firewall-cmd --zone=internal --add-service http --permanent
firewall-cmd --reload
The config was pretty simple. I had make a directory at /var/www/tftpboot which I'll get to in the phone config section, that would serve as the doc root.
Cisco expects the HTTP server for phone config, when not using TLS, to be on port 6970.
server {
  listen 172.30.11.1:6970;
  root /var/www/tftpboot;
}
And a simple restart of nginx systemctl restart nginx and we had our config HTTP server.
NTP
One more stop before we configure the phone, NTP is pretty important when it comes to SIP and phones. I wanted the time to be accurate to avoid negotiation problems later.
Rocky Linux ships with chronyd pre-installed and configured to listen on all interfaces with udp/123. All I need to do is make sure my voice network can reach it.
firewall-cmd --zone=internal --add-service ntp --permanent
firewall-cmd --reload
Phone config
Configuration of the phone was going to be fun for me because, despite working with Cisco Call Manager, you never actually view the xml config file. This will be a bit educational for me as I see the underlying way the phone is told how to look and behave.
UseCallManager makes available a set of example configurations for the phone config. I won't be using everything here, at least at the moment, but it is helpful!
Another resource UseCallManager has is a page on overview of configuring the main phone config file. This was very much a jump start on configuring the phone.
I won't cover every line here, because this file is quite long, instead I'm going to use the provided SEPMAC.cnf.xml file as a base, and describe my changes.
First, I set the timezone, date format, and the NTP server IP
    <dateTimeSetting>
    <dateTemplate>Y/M/D</dateTemplate>
      <timeZone>Mountain Standard/Daylight Time</timeZone>
      <ntps>
        <ntp>
          <name>172.30.11.1</name>
          <ntpMode>unicast</ntpMode>
        </ntp>
      </ntps>
    </dateTimeSetting>
Then, while we haven't yet configured Asterisk, we know what our server will be, so I added that.
    <callManagerGroup>
      <members>
        <member priority="0">
          <callManager>
            <ports>
              <sipPort>5060</sipPort>
              <securedSipPort>5061</securedSipPort>
            </ports>
            <processNodeName>172.30.11.1</processNodeName>
          </callManager>
        </member>
      </members>
    </callManagerGroup>
A small cosmetic thing, I set the phoneLabel to my username :P
<phoneLabel>Somone77</phoneLabel>Then, we configure our first line. We'll add some more later, but this is the first one. While we haven't decided on a dial plan quite yet, I saw no reason to let my extension DN range start with 3XX, so 301 will be my first line.
    <sipLines>
      <line button="1" lineIndex="1">
        <featureID>9</featureID>
        <featureLabel>(External CID number)</featureLabel>
        <proxy>USECALLMANAGER</proxy>
        <port>5060</port>
        <name>301</name>
        <displayName>Trevor</displayName>
        <autoAnswer>
          <autoAnswerEnabled>0</autoAnswerEnabled>
        </autoAnswer>
        <callWaiting>3</callWaiting>
        <authName>301</authName>
        <authPassword>(randomPasswordText)</authPassword>
        <contact></contact>
        <sharedLine>false</sharedLine>
        <messageWaitingLampPolicy>3</messageWaitingLampPolicy>
        <messageWaitingAMWI>0</messageWaitingAMWI>
        <messagesNumber>8500</messagesNumber>
        <ringSettingIdle>4</ringSettingIdle>
        <ringSettingActive>5</ringSettingActive>
        <forwardCallInfoDisplay>
          <callerName>true</callerName>
          <callerNumber>true</callerNumber>
          <redirectedNumber>true</redirectedNumber>
          <dialedNumber>true</dialedNumber>
        </forwardCallInfoDisplay>
        <maxNumCalls>5</maxNumCalls>
        <busyTrigger>4</busyTrigger>
        <recordingOption>enable</recordingOption>
      </line>
    </siplines>
Here a small change to turn the display off at night.
    <daysDisplayNotActive>1,7</daysDisplayNotActive>
    <displayOnTime>07:00</displayOnTime>
    <displayOnDuration>14:00</displayOnDuration>
    <displayIdleTimeout>00:10</displayIdleTimeout>
And finally some localization settings
  <userLocale>
    <name>English_United_States</name>
    <uid>1</uid>
    <langCode></langCode>
    <version></version>
    <winCharSet>utf-8</winCharSet>
  </userLocale>
  <networkLocale></networkLocale>
  <networkLocaleInfo>
    <name>United_States</name>
    <version></version>
  </networkLocaleInfo>
With that, we should have a basic phone config. I wrote this to /var/www/tftpboot/SEP28C7CED7C3B4.cnf.xml and with that, it's time to move on to configuring Asterisk.
Asterisk Config
The first thing we need Asterisk to do is start, run, and allow the phone to register.
An anecdote with hindsight, because it wasn't clear to me when I was first starting. Asterisk deprecated the chan_sip provider, in favor of the newer pjsip provider. However, the UseCallManager patch relies on chan_sip. The newer versions of the patch have a community maintained version of chan_sip, however it does mean that some configuration is... Annoying
Modules
First, because we're using chan_sip and it comes disabled by default, we need to enable it and remove some conflicts.
; /etc/asterisk/modules.conf

;noload = chan_sip.so
noload = chan_pjsip.so
noload = res_pjsip_endpoint_identifier_anonymous.so
noload = res_pjsip_messaging.so
noload = res_pjsip_pidf.so
noload = res_pjsip_session.so
noload = func_pjsip_endpoint.so
noload = res_pjsip_endpoint_identifier_ip.so
noload = res_pjsip_mwi.so
noload = res_pjsip_pubsub.so
noload = res_pjsip.so
noload = res_pjsip_acl.so
noload = res_pjsip_endpoint_identifier_user.so
noload = res_pjsip_nat.so
noload = res_pjsip_refer.so
noload = res_pjsip_t38.so
noload = res_pjsip_authenticator_digest.so
noload = res_pjsip_exten_state.so
noload = res_pjsip_notify.so
noload = res_pjsip_registrar_expire.so
noload = res_pjsip_transport_websocket.so
noload = res_pjsip_caller_id.so
noload = res_pjsip_header_funcs.so
noload = res_pjsip_one_touch_record_info.so
noload = res_pjsip_registrar.so
noload = res_pjsip_diversion.so
noload = res_pjsip_log_forwarder.so
noload = res_pjsip_outbound_authenticator_digest.so
noload = res_pjsip_rfc3326.so
noload = res_pjsip_dtmf_info.so
noload = res_pjsip_logger.so
noload = res_pjsip_outbound_registration.so
noload = res_pjsip_sdp_rtp.so
noload = res_pjsip_outbound_publish.so
noload = res_pjsip_config_wizard.so
Phone SIP Peer
Then, we need some basic configuration for the phone. A lot of this started with a base from UseCallManager.
; /etc/asterisk/sip.conf

[phones](!)
type=friend
context=phone
host=dynamic
trustrpid=no
parkinglot=default
allowsubscribe=yes
notifyhold=no
callcounter=yes
videosupport=no
disallow=all
allow=g722,ulaw,alaw,g729

[non-secure-mode](!)
transport=tcp

[cisco-usecallmanager](!,phones)
transport=tcp
nat=no
directmedia=no
sendrpid=rpid
rpid_update=yes
rpid_immediate=yes
send_diversion=yes
dndbusy=yes
cisco_usecallmanager=yes
cisco_pickupnotify_alert=from,to
cisco_pickupnotify_timer=5
cisco_keep_conference=no
cisco_multiadmin_conference=yes
huntgroup_default=no

[cisco-9971](!,cisco-usecallmanager)
busylevel=5
call-limit=6
; <videoCapability> also needs to be enabled in SEPMAC.cnf.xml
videosupport=yes
; Allow the video codec
allow=h264

[301](cisco-9971,non-secure-mode)
secret=passwordHere
callerid="Trevor" <301>
description=Trevor
callgroup=1
pickupgroup=1
mailbox=301@default
And with that, a restart of asterisk (systemctl restart asterisk) later, I plugged in my phone and it registered!
# asterisk -r
*CLI> sip show peers
Name/username             Host                                    Dyn Forcerport Comedia    ACL Port     Status      Description
301/301                   172.30.11.11                             D  No         No             50097    Unmonitored Trevor
Basic Dial Plan
I wanted to make a very simple test call to confirm anything was working at all. To do this, I set up a simple pattern and a hello-world file that comes with Asterisk.
; /etc/asterisk/extensions.conf

[internal]
exten => 100,1,Answer()
  same => n,Wait(1)
  same => n,Playback(hello-world)
  same => n,Hangup()

[phone]
include => internal
I reloaded the dial plan with asterisk -rx 'dialplan reload' and tried dialing 100 on the phone. I was greeted by a cheerful celebratory voice "Hello World!"
Outbound/Inbound Dialing
From my original homelab, I still had an account with SIP provider Flowroute along with a set of DIDs.
What I had to do was configure the SIP trunk in Asterisk, with registration as we are behind NAT, and a more advanced dial plan.
Flowroute SIP Trunk
The configuration of the SIP trunk for Flowroute ended up being more frustrating than I expected. This is because of limitations in the behavior of the original chan_sip module. pjsip improves a lot of this handling dramatically, but as the two modules conflict, I had to make this work with chan_sip
Initially, I configured the peer like this:
; /etc/asterisk/sip.conf

[general]
;register => tcp://(techprefix):(password)@us-west-or.sip.flowroute.com
register => tcp://(techprefix):(password)@us-east-va.sip.flowroute.com

[trunks](!)
type=friend
context=pstn-trunk
transport=tcp
; I'll cover NAT later
nat=force_rport,comedia
directmedia=no

[trunk-flowroute](!)
; I set the fromdomain because I experienced some rejected SIP INVITEs without it. It doesn't resolve.
fromdomain=sip.somnet.io
username=(techprefix)
remotesecret=(password)

[flowroute](trunks,trunk-flowroute)
;host=us-west-or.sip.flowroute.com
host=us-east-va.sip.flowroute.com
However, this config had a problem. Outbound calling would work fine, however inbound calling would intermittently fail. This is because chan_sip does not resolve all IP addresses in the provided SRV records for these domains. So, inbound dialing would fail to dial from the appropriate context.
As a result, I had to add the following:
; /etc/asterisk/sip.conf

; Flowroute West
[flowrouteWest1](trunks,trunk-flowroute)
host=34.210.91.112
[flowrouteWest2](trunks,trunk-flowroute)
host=34.210.91.113
[flowrouteWest3](trunks,trunk-flowroute)
host=34.210.91.114
[flowrouteWest4](trunks,trunk-flowroute)
host=34.210.91.115
[flowrouteWest5](trunks,trunk-flowroute)
host=34.210.91.116
[flowrouteWest6](trunks,trunk-flowroute)
host=34.210.91.117
[flowrouteWest7](trunks,trunk-flowroute)
host=34.210.91.118
[flowrouteWest8](trunks,trunk-flowroute)
host=34.210.91.119
[flowrouteWest9](trunks,trunk-flowroute)
host=34.210.91.120
[flowrouteWest10](trunks,trunk-flowroute)
host=34.210.91.121
[flowrouteWest11](trunks,trunk-flowroute)
host=34.210.91.122
[flowrouteWest12](trunks,trunk-flowroute)
host=34.210.91.123
[flowrouteWest13](trunks,trunk-flowroute)
host=34.210.91.124
[flowrouteWest14](trunks,trunk-flowroute)
host=34.210.91.125
[flowrouteWest15](trunks,trunk-flowroute)
host=34.210.91.126
[flowrouteWest16](trunks,trunk-flowroute)
host=34.210.91.127

; Flowroute East
[flowrouteEast1](trunks,trunk-flowroute)
host=34.226.36.32
[flowrouteEast2](trunks,trunk-flowroute)
host=34.226.36.33
[flowrouteEast3](trunks,trunk-flowroute)
host=34.226.36.34
[flowrouteEast4](trunks,trunk-flowroute)
host=34.226.36.35
[flowrouteEast5](trunks,trunk-flowroute)
host=34.226.36.36
[flowrouteEast6](trunks,trunk-flowroute)
host=34.226.36.37
[flowrouteEast7](trunks,trunk-flowroute)
host=34.226.36.38
[flowrouteEast8](trunks,trunk-flowroute)
host=34.226.36.39
[flowrouteEast9](trunks,trunk-flowroute)
host=34.226.36.40
[flowrouteEast10](trunks,trunk-flowroute)
host=34.226.36.41
[flowrouteEast11](trunks,trunk-flowroute)
host=34.226.36.42
[flowrouteEast12](trunks,trunk-flowroute)
host=34.226.36.43
[flowrouteEast13](trunks,trunk-flowroute)
host=34.226.36.44
[flowrouteEast14](trunks,trunk-flowroute)
host=34.226.36.45
[flowrouteEast15](trunks,trunk-flowroute)
host=34.226.36.46
[flowrouteEast16](trunks,trunk-flowroute)
host=34.226.36.47
Yeah, I hate it too. But it works.
Outbound Dial Plan
The dial plan ended up not being that complicated, but it took me quite a bit of trial and error as the Asterisk extensions config is... Unintuitive.
In the Cisco world, I would be used to thinking in terms of calling search spaces, route patterns, and translation patterns for my dial plan. To make things a bit familiar to myself, I treated the contexts like I would a calling search space.
I changed my phone's context to phone-int to stand for "international". While I would only have, essentially, one phone, this seems silly but it was about learning. In a real environment, I'd have contexts for phones to have internal-only, local, long distance, or international dialing in order to allow for restricted phones.
[globals]
TRUNKMSD=1
TRUNK=SIP/flowroute

internal]
exten => 100,1,Answer()
  same => n,Wait(1)
  same => n,Playback(hello-world)
  same => n,Hangup()

[trunkint]
;
; International long distance through trunk
;
exten => _9011.,1,Dial(${GLOBAL(TRUNK)}/${FILTER(0-9,${EXTEN:${GLOBAL(TRUNKMSD)}})})

[trunkld]
;
; Long distance context accessed through trunk
;
exten => _91NXXNXXXXXX,1,Dial(${GLOBAL(TRUNK)}/${EXTEN:${GLOBAL(TRUNKMSD)}})

[trunklocal]
;
; Local seven-digit dialing accessed through trunk interface
; Technically speaking, Flowroute doesn't actually support local calling this way. I have it here as an example, but this route would fail.
; I may in the future come and do some translation to allow this a rough analog by prepending the CID's area code
;
exten => _9NXXXXXX,1,Dial(${GLOBAL(TRUNK)}/${EXTEN:${GLOBAL(TRUNKMSD)}})

[trunktollfree]
;
; Long distance context accessed through trunk interface
;
exten => _91800NXXXXXX,1,Dial(${GLOBAL(TRUNK)}/${EXTEN:${GLOBAL(TRUNKMSD)}})
exten => _91888NXXXXXX,1,Dial(${GLOBAL(TRUNK)}/${EXTEN:${GLOBAL(TRUNKMSD)}})
exten => _91877NXXXXXX,1,Dial(${GLOBAL(TRUNK)}/${EXTEN:${GLOBAL(TRUNKMSD)}})
exten => _91866NXXXXXX,1,Dial(${GLOBAL(TRUNK)}/${EXTEN:${GLOBAL(TRUNKMSD)}})

[international]
ignorepat => 9
include => trunklocal
include => trunktollfree
include => trunkld
include => trunkint

[phone-int]
include => internal

; Match on all outbound dialing with '9' prefix, and set the CallerID to the external number for the extension
exten => _9X./_301,1,Set(CALLERID(ALL)=Trevor C. <11111111111>)
exten => _9X.,n,Goto(international,${EXTEN},1)
Next, we needed to handle inbound dialing.
Inbound Dial Plan
We will make this far more feature complete later. For this purpose, I started by utilizing the stdexten context subroutine that the example extensions.conf comes with.
; /etc/extensions.conf

[stdexten]
;
; Standard extension subroutine:
;   ${EXTEN} - Extension
;   ${ARG1} - Device(s) to ring
;   ${ARG2} - Optional context in Voicemail
;
exten => _X.,50000(stdexten),NoOp(Start stdexten)
        same => n,Set(LOCAL(ext)=${EXTEN})
        same => n,Set(LOCAL(dev)=${ARG1})
        same => n,Set(LOCAL(cntx)=${ARG2})
        same => n,Set(LOCAL(mbx)=${ext}${IF($[!${ISNULL(${cntx})}]?@${cntx})})
        same => n,Dial(${dev},20)
        same => n,Goto(stdexten-${DIALSTATUS},1)

exten => stdexten-NOANSWER,1,VoiceMail(${mbx},u)
        same => n,Return()

exten => stdexten-BUSY,1,VoiceMail(${mbx},b)
        same => n,Return()

exten => _stde[x]te[n]-.,1,Goto(stdexten-NOANSWER,1)

exten => a,1,VoiceMailMain(${mbx})
exten => a,n,Return()

;
; Incoming PSTN trunk calls
;
[pstn-trunk]
include => stdexten

exten = 11111111111,1,Gosub(stdexten(SIP/301))
This will work fairly simply. As the PSTN call comes in, the dialed number is the full 11-digit phone number. We simply match that number and dial the corresponding extension.
This isn't exactly very elegant, as it means that translation/assignment of an extension's DID is done in two places. For my purpose, that doesn't matter too much, but in a real world scenario, something far better should be done.
Now, if I made a call in our out of my system, the call would ring and connect. However, I had a problem I anticipated: NAT
NAT/STUN/TURN
Famously, SIP is a protocol which communicates a UDP data channel inside the signaling conversation. This has some benefits for voice signaling that is the reason it has stuck around despite nearly every other protocol abandoning that approach.
One of those is the ability for signaling to negotiate direct media in which the signaling provider doesn't route/handle the voice traffic. Flowroute requires direct media, which makes sense from a VoIP provider's perspective. You can operate with significantly lower cost by staying out of the media chain.
However, for me, this poses a problem. I'm behind a NAT that I do not control.
When SIP sends the media destination to the other side, it includes an IP and UDP port. That IP address has to be the publicly connectable IP address. If you're behind NAT, the voice gateway has no idea what your public IP address is for the traffic to get back.
As well, for media, the traffic is UDP and need to be allowed through NAT to the voice gateway. Usually, you can forward a UDP port range to your voice gateway from the Internet, ensuring that any port the SIP conversation negotiates will be routed properly. However, I'm not able to forward ports.
To solve the first problem, Asterisk uses a standard called Interactive Connectivity Establishment or "ICE" to assist with connectivity through NAT. In simple terms, ICE is a framework of using a series of tools (STUN and TURN) to establish reliable connectivity through multiple layers of NAT. This is commonly used for SIP, as well as even newer protocols like WebRTC. This approach is also common in video games with serverless peer to peer sessions.
Configuring Asterisk to use STUN to identify the public IP address is actually very simple. We only need to configure the res_stun_monitor module
; /etc/asterisk/res_stun_monitor.conf

[general]
; I have an existing STUN server for use with WebRTC signaling. You can use public free STUN servers too.
stunaddr = turn.somnet.io
stunrefresh = 30
And that's really it. The reason is, most modules in Asterisk like chan_sip, IAX, and RTP, will, by default, use the STUN address when res_stun_monitor is configured.
What I didn't expect, was that once I made this change, I picked up the phone, dialed my cell phone and I had two-way audio!
I expected to need to configure TURN as well to provide a tunneling relay for media. However, it appears that there is a SIP ALG-type device (or perhaps a firewall with layer 7 inspection) that is dynamically allowing the UDP traffic for the media. I was really surprised by this. A welcome surprise! Though that means we don't really get to play with TURN!
At this point, we had a working system. We can make calls out, receive calls, and everything was working great.
However, we wanted to have more fun.
Bonus Features
There were several additional things I wanted to do, now that I had a base working system. Some of them are features of the Cisco 9971 that I wanted to work, call recording, music on hold, another phone I wanted to get working, and another private SIP trunk to set up.
Voicemail
One of the things I was curious about was voicemail. Specifically, I wanted to know if the UseCallManager patch included support for proper Message Waiting Indicators (MWI) with the 9971.
This actually ended up being pretty easy, surprisingly!
First, we needed to actually define the mailbox. There's actually nothing to this.
; /etc/asterisk/voicemail.conf

[default]
301 => 1234,Trevor C,[email protected]
Which simply defines our mailbox and initial PIN. The email address is used for email notifications of voicemails, which I haven't configured.
Next, we needed to make some dial plan changes.
; /etc/asterisk/extensions.conf

[voicemail]
exten => 8500,1,Set(CONNECTEDLINE(all)="Voice Mail" <${EXTEN}>)
  same => n,Answer()
  same => n,Wait(0.5)
  same => next,Set(MAILBOX=${SIPPEER(${CHANNEL(peername)},mailbox)})
  same => next,VoiceMailMain(${MAILBOX})
  same => next,Hangup(normal_clearing)

[phone-int]
include => internal
include => voicemail

; Match on all outbound dialing with '9' prefix, and set the CallerID to the external number for the extension
exten => _9X./_301,1,Set(CALLERID(ALL)=Trevor C. <11111111111>)
exten => _9X.,n,Goto(international,${EXTEN},1)
Finally, in the phone config, we needed to define the voicemail number on the line config.
  <line button="1" lineIndex="2">
    ...
    <messagesNumber>8500</messagesNumber>
    ...
  </line>
And as simply as that, calling the extension and letting it go to voicemail would work perfectly. The phone MWI would illuminate the lamp and show the message waiting on the display. The voicemail button would dial 8500 and the voicemail IVR would work as expected.
Call Recording
Before you ask, I live in a one-party consent state for recording.
In my homelab, I used to have a Cisco MediaSense server to support call recording. This was a very useful feature on occasion, and one that, once you need it, it's too late.
Luckily, Asterisk has call recording features readily available, and the UseCallManager documentation on line keys actually covers this.
In the phone config, we need to add the record button as a line button to the phone. I wanted this in the last line spot, so I edited the phone config to add this line
  <line button="6" lineIndex="6">
    <featureID>159</featureID>
    <featureLabel>Record</featureLabel>
  </line>
Then, add a dial plan context to support this. The UseCallManager documentation does a clever thing here to bring the call into a conference bridge in order to capture both sides of the call in one audio file.
; /etc/asterisk/extensions.conf

[record]
exten => record,1,Answer()
same => next,Wait(0.5)
same => next,Set(CONFBRIDGE(bridge,record_conference)=yes)
same => next,Set(CONFBRIDGE(bridge,record_file)=${RECORD_PEERNAME})
same => next,Set(CONFBRIDGE(user,quiet)=yes)
; Other channel variables available are ${RECORD_CHANNEL} and ${RECORD_DIRECTION}.
same => next,ConfBridge(${RECORD_UNIQUEID})
same => next,Hangup(normal_clearing)

[phone-int]
include => record
include => internal
include => voicemail

; Match on all outbound dialing with '9' prefix, and set the CallerID to the external number for the extension
exten => _9X./_301,1,Set(CALLERID(ALL)=Trevor C. <11111111111>)
exten => _9X.,n,Goto(international,${EXTEN},1)
Now, when on a call, you can press the Record line and the call will begin recording. The phone will illuminate the line with a red light and display a message to confirm the recording started.
Asterisk will write the recording as a .raw file in /var/spool/asterisk/monitor
The raw file isn't easy to play on its own, but Asterisk makes a nice way to convert it to a wav file.
*CLI> file convert /var/spool/asterisk/monitor/301-1787109969.raw /var/spool/asterisk/monitor/output.wav
Converted /var/spool/asterisk/monitor/301-1787109969.raw to /var/spool/asterisk/monitor/output.wav in 0ms
Which will output the file as output.wav as described. This file is playable in most anything. However, I noticed that the audio is only in the left channel. This makes sense because of the method of record with the conference bridge. The call could easily be made mono by passing through ffmpeg.
Music On Hold
One of the few ways you can make a VoIP system feel like home is by setting your own hold music.
I remember I was once on a meeting with some executives from a past employer, a major client of ours, and some vendor resources and I went to make a test call through a system and neglected to realize that, as I was doing so, they were listening to a very loud and compressed version of Rick Astley's Never Gonna Give You Up
In any case, I needed some hold music.
I already had one in mind, this absolute masterpiece that I remember watching the premiere countdown for a few years ago. Divine.
A friend of mine had some honorable mentions which I did end up using for test extensions later, like the hello-world one.
First, we needed to download and convert the video's audio to ulaw. This is straight forward.
# First, download the audio. This is delivered as .opus these days
yt-dlp -x https://www.youtube.com/watch?v=cLdTjcYzNAA

# Then, convert the opus file to a .wav
sox doo\ doo\ doo\ doo\ doo\ \[cLdTjcYzNAA\].opus -r 8000 -c 1 -b 16 doodoo.wav
Where we will put this doodoo.wav file is actually in a folder path /var/lib/asterisk/moh-custom
Then, we modify the asterisk config to add this custom MOH directory.
; /etc/asterisk/musiconhold.conf

[moh-custom]
mode=files
directory=moh-custom
Finally, the dial plan needs to change the musicclass when we make calls. I added this to the phone-int context simply:
; /etc/asterisk/extensions.conf

[phone-int]
include => record
include => internal
include => voicemail

; Match on all outbound dialing with '9' prefix, and set the CallerID to the external number for the extension
exten => _9X./_301,1,Set(CALLERID(ALL)=Trevor C. <11111111111>)
exten => _9X.,n,Set(CHANNEL(musicclass)=moh-custom)
exten => _9X.,n,Goto(international,${EXTEN},1)
This will handle setting the feature on outbound calls. Inbound calls can do much the same by adding the line to the stdexten subroutine class.
Rotary Phone
Something I saved from the family farm house before it was tore down is a set of rotary phones from the 60s.
If you've ever visited my music shelf you may have noticed the phone by my turntable.

The middle of the dial should have a card with the phone's number, I should make a new one
This phone is a Stromberg Carlson S-C 500D from 1967. Now, this isn't a rare phone, there were many many thousands of these and you can find them online for $25-$30. This one, however, is mine.
Over a decade ago, I had added a pulse-to-tone module called rotatone. I knew this module worked because the phone operated in my homelab fine.
However, in my homelab, I had a voice gateway in the form of a Cisco 2911 ISR with an FXS module. In my current setup, I have no way of providing an FXS connection for a phone.
I decided to purchase a simple SIP ATA which was straight forward to configure.
In the asterisk config, I added an entry for HT802 devices.
; /etc/asterisk/sip.conf

[ht802](!)
type=friend
host=dynamic
context=phone-int
allowsubscribe=yes
transport=udp
nat=no

[310](ht802)
secret=password
description=Rotary Phone
The HT802 configuration was unremarkable. I connected it to my wired network and used its web interface to add the SIP server, username, and password. This device is on the voice network so is also not accessible outside of that network.
Just like that, I dial 310 from my 9971 and hear that wonderful ring again.
And so could my neighbors.
LARPA Trunk
The final bonus thing I wanted to do is participate in the telephone network with the members of the LARPA network. I wrote a post on my peering to that group earlier this year.
First, I had to connect my little VoIP server to the LARPANET network. I already had my router peered to that network. I decided to handle this through a simple wireguard tunnel and some static routing.
ip a show wg_vultr-rtr01
#4: wg_vultr-rtr01: <POINTOPOINT,NOARP,UP,LOWER_UP> mtu 1420 qdisc noqueue state UNKNOWN group default qlen 1000
#    link/none
#    inet 10.240.88.11/31 scope global noprefixroute wg_vultr-rtr01
#       valid_lft forever preferred_lft forever

# I then assigned it to the "dmz" zone in firewalld
firewall-cmd --zone=dmz --change-interface=wg_vultr-rtr01
The LARPANET community uses the IAX2 protocol, an Asterisk specific signaling and media transport protocol, to handle calling instead of SIP. This was another new thing to configure.
First, I had to generate some keys. Asterisk comes with a shell script called astgenkey for this purpose. However, I elected to generate it myself as I wanted to create they key without an encrypted key.
cd /var/lib/asterisk/keys
openssl genrsa -out larpa-88.key 1024
openssl rsa -in larpa-88.key -pubkey -out larpa-88.pub
I also added a public key of another peer (lab 77) as larpa-77.pub in the same directory.
Next, I configured the IAX channel
; /etc/asterisk/iax.conf
; Trunk for Larpa 77
[amber]
type=peer
username=somnet
trunk=yes
description=Larpa Lab 77
host=10.240.77.2
context=larpa-trunk
auth=rsa
outkey=larpa-88
inkeys=larpa-77
qualify=yes
And finally, a dial plan
; /etc/asterisk/extensions.conf
[larpa-trunk]
include => stdexten

exten => _1XX,1,Gosub(internal)
exten => _3XX,1,Gosub(stdexten(${EXTEN:2}))

[trunklarpa]
exten => _7X./_301,1,SET(CALLERID(ALL)=Trevor C. <88301>)
exten => _777XXX,2,Dial(IAX2/amber/${EXTEN:3})

[phone-int]
include => record
include => internal
include => trunklarpa
include => voicemail

exten => _9X./_301,1,Set(CALLERID(ALL)=Trevor C. <11111111111>)
exten => _9X.,n,Set(CHANNEL(musicclass)=moh-custom)
exten => _9X.,n,Goto(international,${EXTEN},1)
However, attempting to make a test call, I saw an error:
WARNING[41255][C-00000001] res_crypto.c: RSA Signature (key larpa-88) failed -1
WARNING[41255][C-00000001] chan_iax2.c: Unable to sign challenge with key
After some quick research, I came across an asterisk issue which described that the system support for SHA1 had been removed and Asterisk relied on it for the signature verification. A contributor to that issue described how to override and enable the LEGACY crypto policy.
update-crypto-policies --set LEGACYWhile not ideal, I think I've been clear that the security of this system isn't a high priority. With that change, this peering worked as expected.
Final Thoughts
I do really enjoy working with VoIP systems. I've worked with big and small configurations and there's something satisfying of being able to make a device ring as almost a celebratory sound after a bunch of work.
It had been quite a while since I flexed some of these homelab muscles, and it took me a bit longer to remember things than I would have liked. While I could have probably asked an LLM many questions along the way to speed things up, I now much better understand Asterisk dial plans, SIP configurations, Cisco IP Phone configs, and had fun along the way.